

This tutorial explains how to add extra fields to the Joomla Contact form using Custom Fields. The process uses core Joomla functionality, requires no third-party extensions, and is fully upgrade-safe.
You’ll learn how to create a field, configure permissions correctly, control where it appears on the form, and ensure submitted values are included in the contact email.
Step 1: Create a Custom Field
We’ll begin by creating a Custom List Field that allows the site visitor to select the type of enquiry they are making.
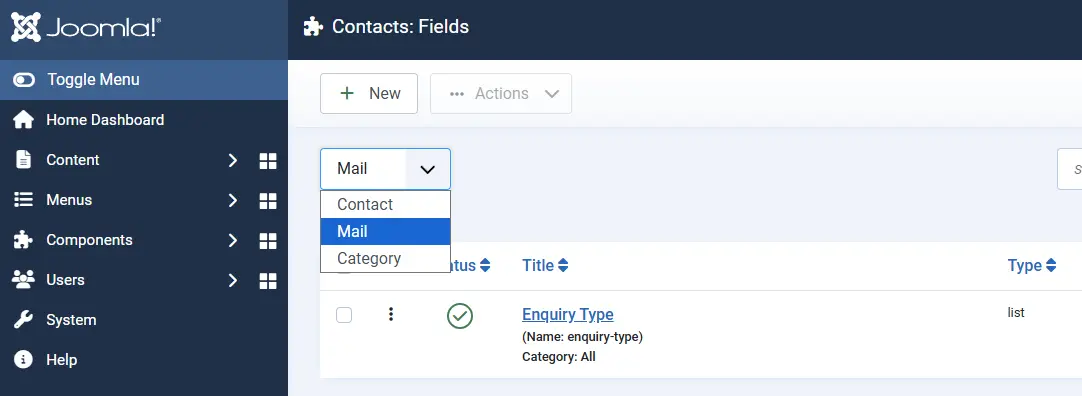
- Go to Components → Contacts → Fields
- Select Mail from the context dropdown
- Select New
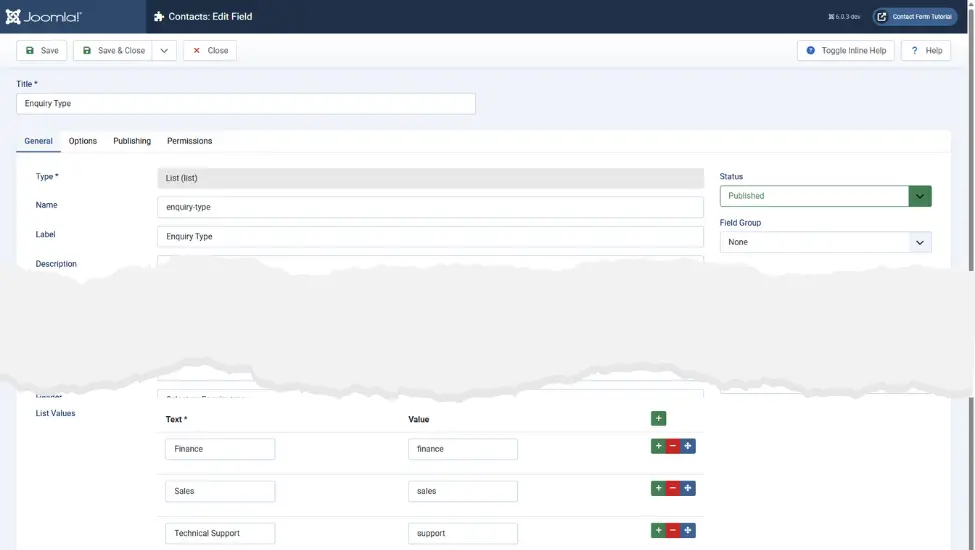
- In the General tab, configure the field:
- Title: e.g. Enquiry Type
- Type: List (set this first)
- Required: Optional
- List Values: Add Text / Value pairs for each option
Select Save & Close.
Why set the type first?
Several configuration options depend on the field type. Selecting List first ensures all relevant settings are available.
Step 2: Change Field Permissions (Critical)
By default, custom fields do not allow unauthenticated users to submit values. Since contact forms are typically used by public visitors, this permission must be adjusted.
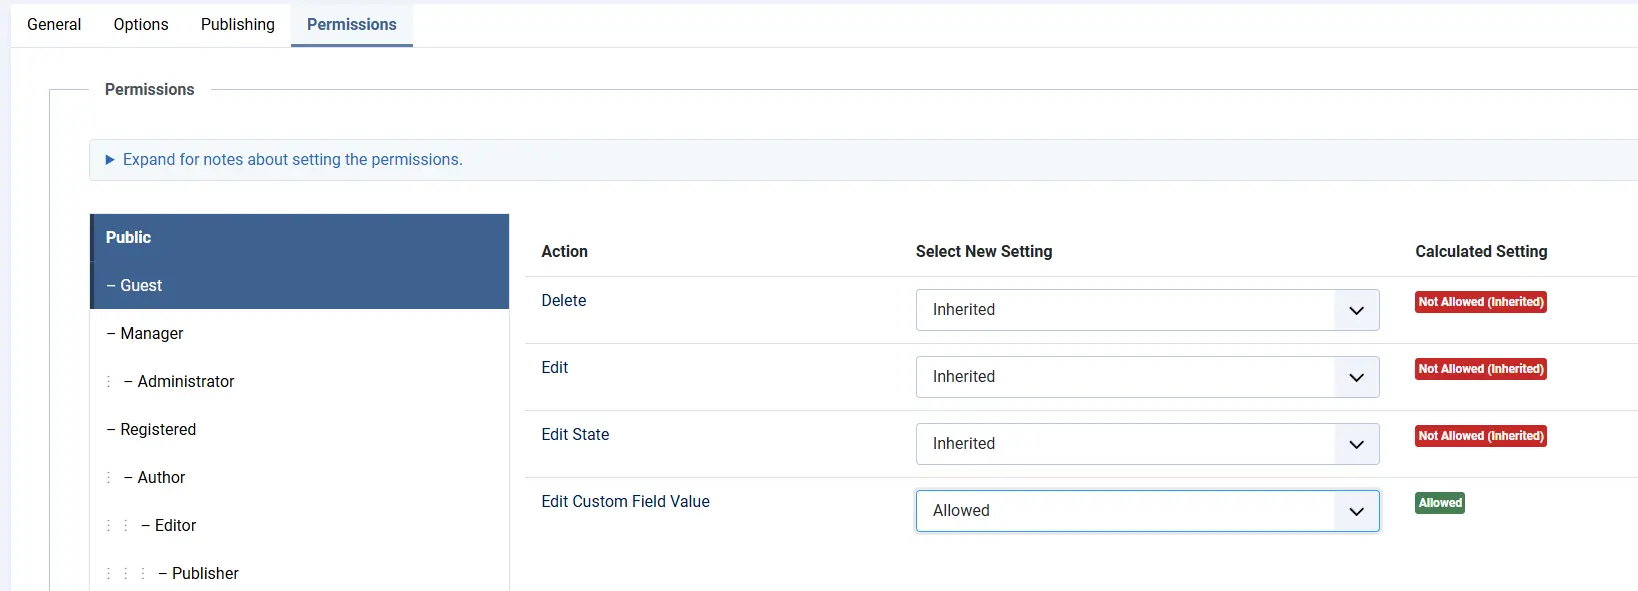
- Edit the custom field
- Open the Permissions tab
- Locate Edit Custom Field Value
- Set Public to Allowed
- Save the field
If this step is skipped, the field may appear on the form but guest users will be unable to select or submit a value.
Step 3: Position the Field on the Contact Form
Next, define where the field appears in the Contact form layout.
Note: At present, all custom fields are rendered at the bottom of the Contact form unless a layout override is used. This is a known issue and is tracked in the Joomla issue tracker.
- Edit the custom field
- Open the Options tab
- Set Display to:
- After Display (recommended), or
- Before Display, depending on your layout
You may also set optional styling values such as Label Class and Field Class.
Save the field when finished.
For precise control over field placement, select Do not Automatically Display and create a template override for default_form.php in the Contact component.
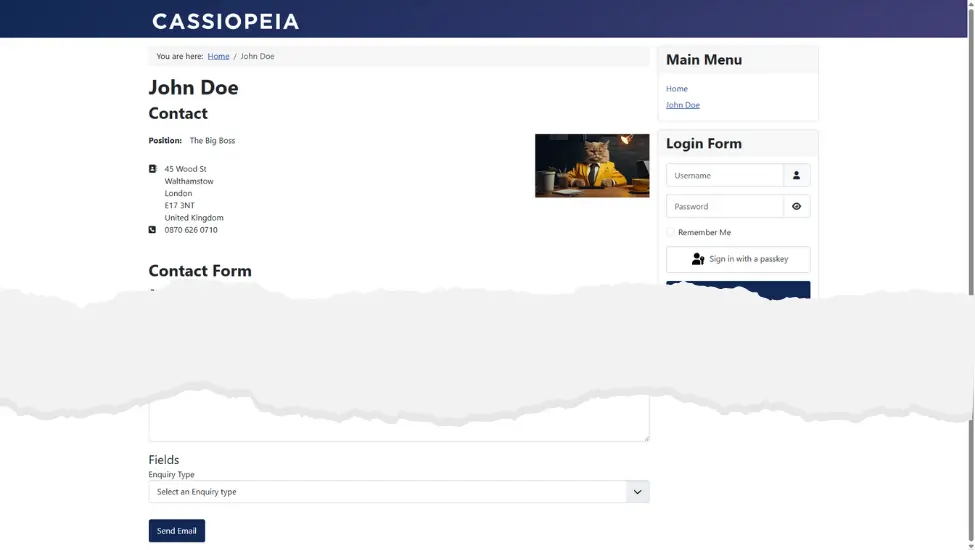
Step 4: Check the Frontend Form
Verify how the field appears to site visitors.
- Open the Contact page on the front end
- Confirm the field is visible
- Confirm a guest (non-authenticated) user can select a value
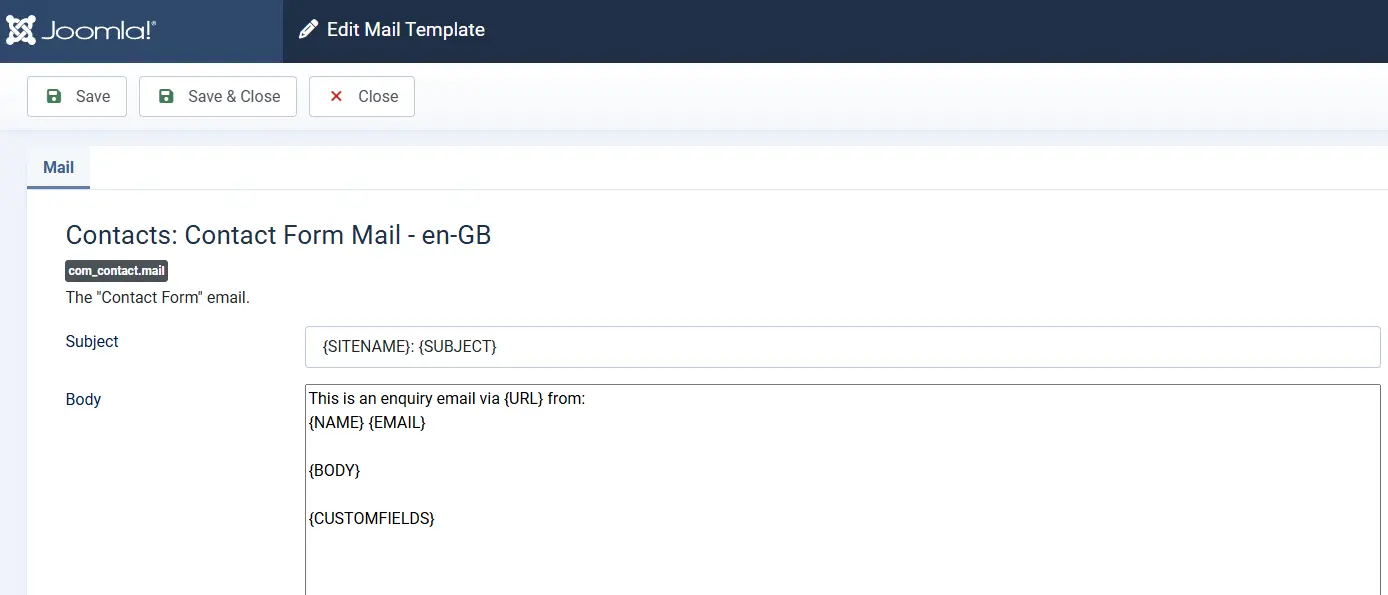
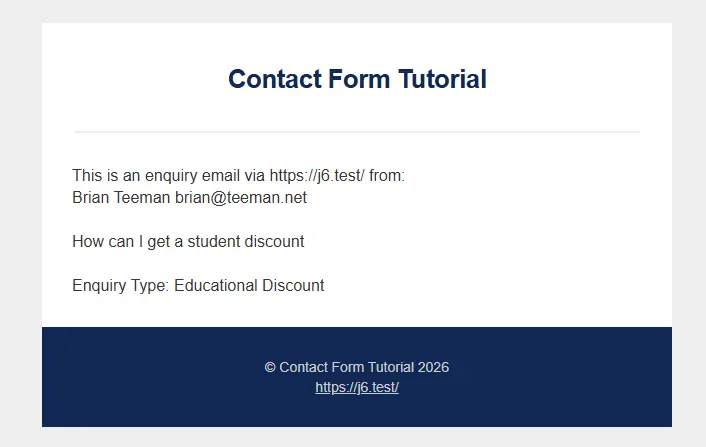
Step 5: Confirm the Email Includes Custom Field Values
Finally, confirm that submitted values are included in the contact email.
- Submit the Contact form
- Open the received email
- Scroll below the main message content
Custom field values should appear automatically under a Custom Fields section.
If the values are missing, check the following:
- The field was created in the Mail context
- Public users are allowed to edit the field value
- System → Mail Templates → Contacts: Contact Form Mail includes the
{CUSTOMFIELDS}placeholder
Common Problems & Fixes
- The field appears but values are empty in the email
Ensure Edit Custom Field Value is allowed for the Public user group. - The field does not appear on the form
Confirm the field was created in the Mail context and is published. - The field appears but cannot be selected
This is almost always a permissions issue. Recheck Step 2. - Custom fields are missing from the email
Edit the contact mail template and ensure the{CUSTOMFIELDS}placeholder is present.
Summary
- Create a custom field using the Mail context
- Allow Public users to submit values
- Choose how the field is displayed
- Verify the frontend layout
- Confirm values appear in the email
Using Custom Fields keeps your Contact form flexible, upgrade-safe, and fully Joomla-native.
Tip: For advanced layouts or conditional logic, combine Custom Fields with a Contact template override.