

This is a guest blog post by Elisa Foltyn
I already setup a lot of websites, but usualy the customers only make small changes to the contents, added some news and left the bigger tasks for me.
This year a customer came along, to whom I promised: “You will be able to edit content very easy.” - Isn’t it the User Experience Guarantee we always give to our users?
Well… I should have checked this first myself from the user perspective - I mean from the perspective of a user without any html knowledge.
The customer is running a blog, where he writes logs from his trips all over the world, with a lot of images. He asked me to create the articles with a different and changing number of columns.
For Example
1 Column » Intro
2 Columns » Images left, Text on the right
2 Columns » Text left, Images on the right
1 Column » Text
Bootstrap 3 offers a very logical grid system for that, as follows:
<div class=”row”>
    <div class=”col-lg-12”>Introtext</div>
</div>

<div class=”row”>
    <div class=”col-lg-6>Images</div>
    <div class=”col-lg-6”>Text</div>
</div>

<div class=”row”>
    <div class=”col-lg-6”>Text</div>
    <div class=”col-lg-6”>Images</div>
</div>

<div class=”row”>
    <div class=”col-lg-12”>Text</div>
</div>
So far so good - at least for those that speak a bit html…
To avoid bothering my customer, because I told him editing content will be easy I created some Content Templates for 1, 2 and 3 Column views. So he can select them from the TinyMCE Templates Menu and use them.
How do you do that?
Setup the Template Option in TinyMCE
To make this option available in TinyMCE you have to setup your TinyMCE plugin and enable Templates. To achieve that:
- Go to Extensions » Plugins
- Search for TinyMCE and open the plugin
- Set your Editor functionality to "extended"
- Then go to the “Advanced” tab and ensure that Templates are not set to "hide"
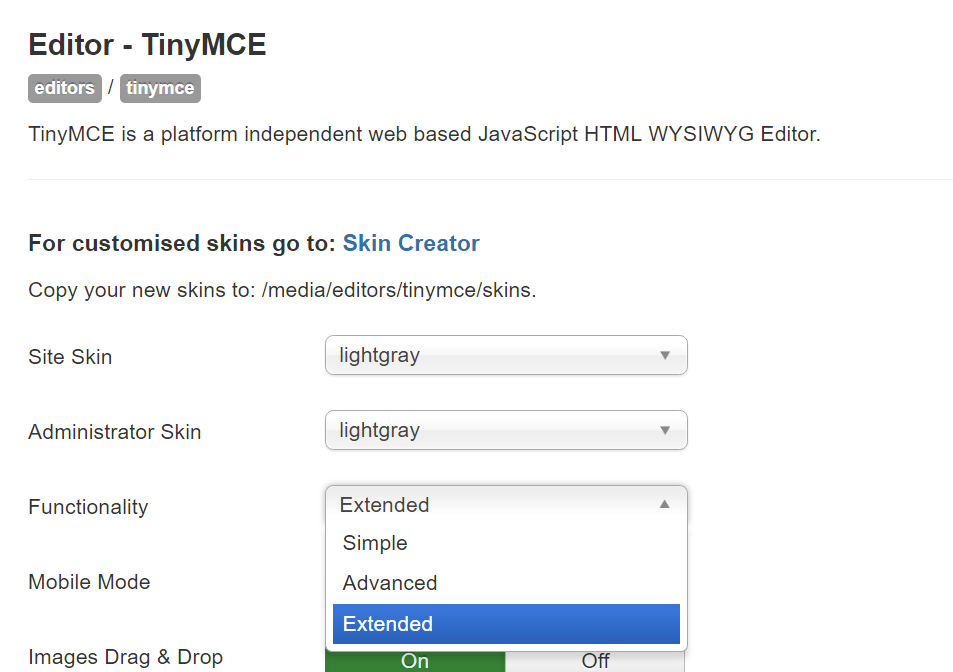
The "Insert template" option will now be visible in your editor.
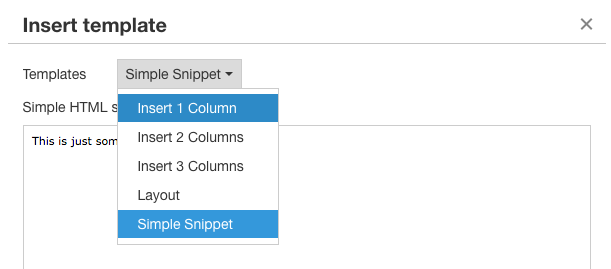
Insert custom Templates
So now we need to add our specific templates to the editor. The TinyMCE Editor Templates are stored in media/editors/tinymce/templates and you will find there is already an example template and an example snippet. You can delete those two, but they might appear after the next Update, so just ignore them.
Add the Templates you want to offer to your customer, as an example, I added a file named column-2 into this folder with the following content:
<div class="row">
	<div class="col-lg-6">
		 Insert Text/Images here
	 </div>
	<div class="col-lg-6">
		 Insert Text/Images here
	</div>
</div>
Next Block comes here
If you want, you can add translations for the Template name with the following scheme:
PLG_TINY_TEMPLATE_COLUMN-2_DESC="This will add a 2 Column Snippet in your Editor"
PLG_TINY_TEMPLATE_COLUMN-2_TITLE="2 Columns"
Note
I added a "Next Block comes here" text outside the div. While you can exit the inner div-Containers in the JCE Editor, there seems to be a small bug in TinyMCE that makes this impossible. The Next Block comes here" can be used by the user to place the cursor outside the container and insert there another template.
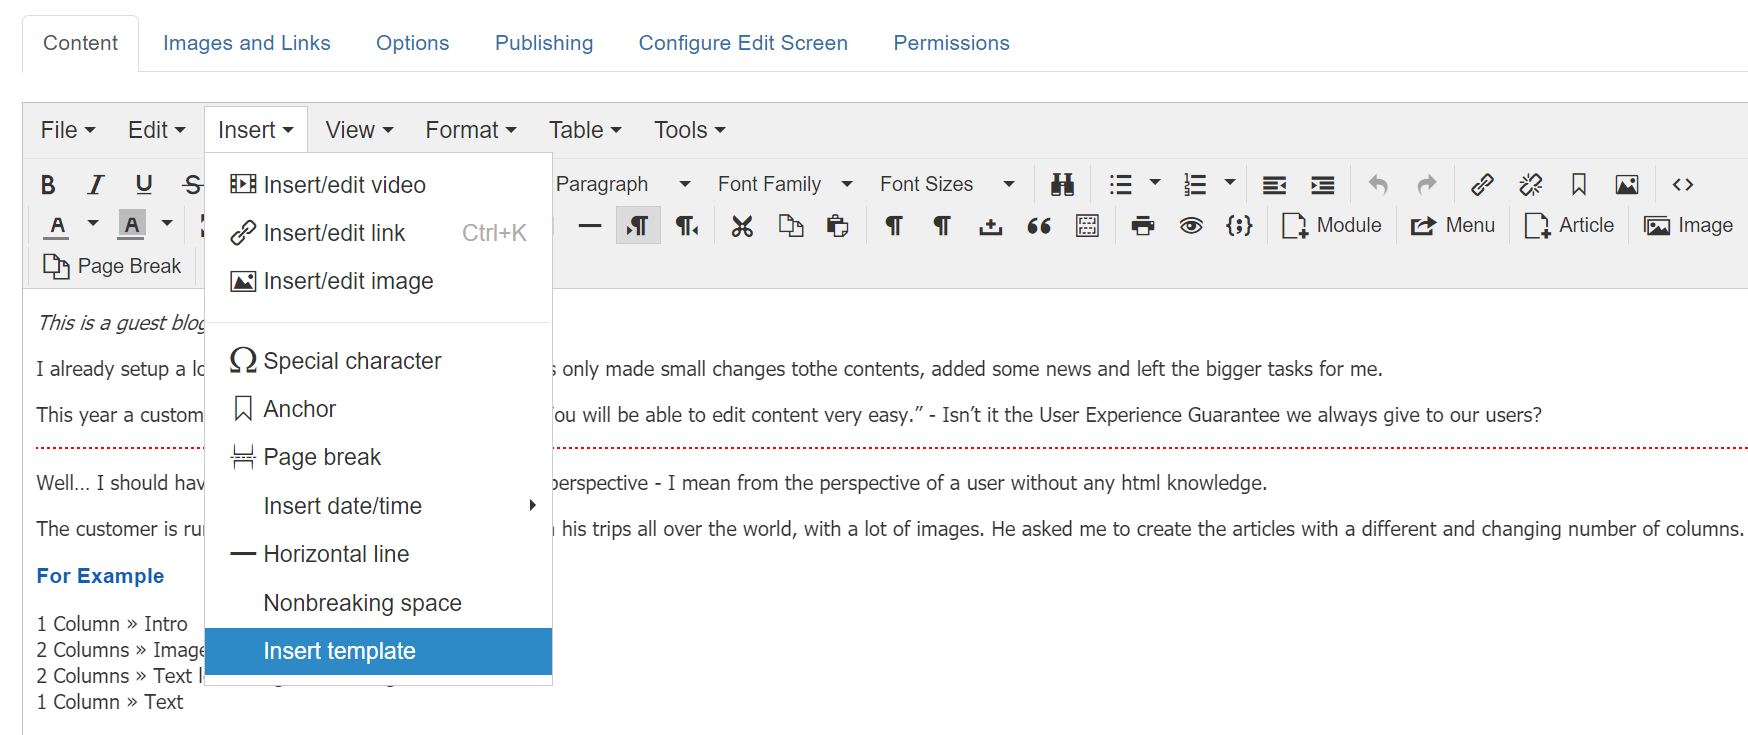
After selecting "Insert Template" from the Insert Menu inside the editor the author now has the possibility to choose the new content templates.
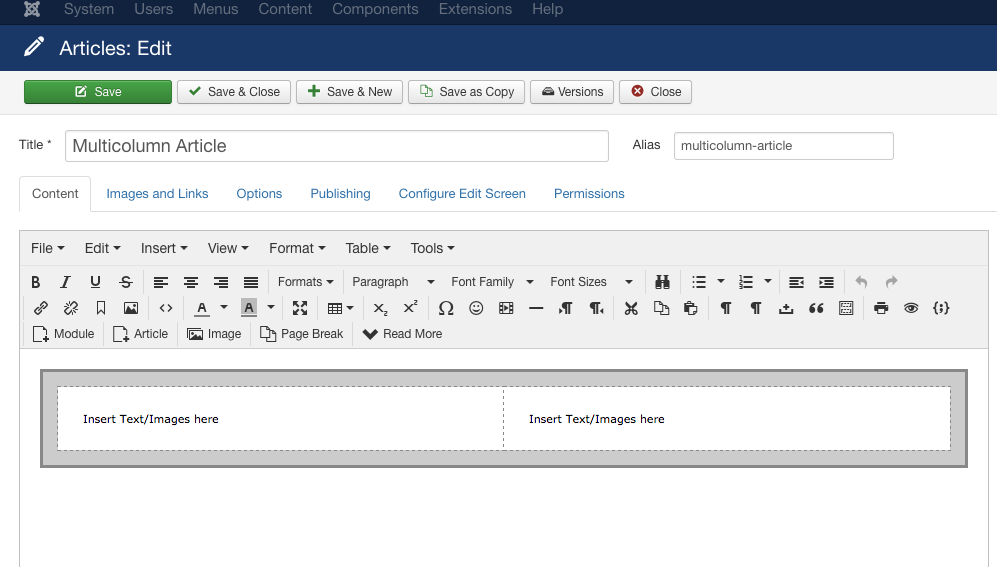
Insert the Template
Let's go for the column-2 now and see what happens. The code is inserted correctly and the customer sees the "Insert Text/Images here" Placeholder. But does this make things easier for him? NOPE. It's still too easy for someone who doesn't code not to mess up any existing markup even with having a template. Even with the "Show Blocks" functionality of TinyMCE it's still not manageable.

And here comes the reason why you find this article as a guest posthere.
Last week, Brian published a Blog Article about Improving the content Editor and I asked him what he would do in my situation. And he recommended me, as written in this article to add outlines inside the editor.css for the customer to see where the content starts and ends. Inspired by this i added an editor.css file into the template with some special css-definitions:
#tinymce {
  padding: 15px;
}

img {
  max-width: 100%;
}

.row {
  background: #ccc;
  outline: 3px #888 solid;
  padding: 15px;
  display: -ms-flexbox;
  display: -webkit-flex;
  display: flex;
  -ms-flex-wrap: wrap;
  -webkit-flex-wrap: wrap;
  flex-wrap: wrap;
}

div[class*="col-"] {
  background: #fff;
  outline: 1px #888 dashed;
  box-sizing: border-box;
  padding: 25px;
}

.col-lg-4, .col-lg-6, .col-lg-12 {
  position: relative;
  float: left;
}

.col-lg-12 {
  width: 100%;
}

.col-lg-6 {
  width: 50%;
}

.col-lg-4 {
  width: 33.33333333%;
}
Note that I only added here the definitions that I needed for the editor appearance to work. I didn’t add the font styles yet as mentioned in the original post.
The result of adding the editor.css is following:
Our customer can now easily use the provided templates. Of course the columns will not appear like this in the frontend, but it's quite easy for the author to understand the layout now.
I tested the same with another CSS-Framework (UI Kit) and with the Template Option from the JCE Editor. This works almost exactly as described above.


 Congratulations, you discovered a hidden secret!